The Guarding Vision app is designed to work with DVRs, NVRs and IP cameras which support Cloud P2P function. It allows you to live view your cameras remotely. All you need to do is creating an account and adding device into the account, then you can enjoy the real-time video from cameras on a global scale. It also allows you to play back recorded video to search every milestone of your life. When motion detection alarm of your device triggered, you can get an instant message notification from Guarding Vision app.
Network Setup for NVR/DVR/IP Camera before adding to Guarding Vision
The Following network settings must be checked before adding the device to Guarding vision App.
Method 1: From NVR Local menu
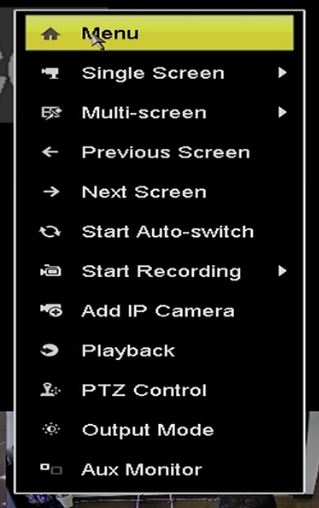
Step 1: Right Click on the NVR Monitor and select “Menu”.
.
.
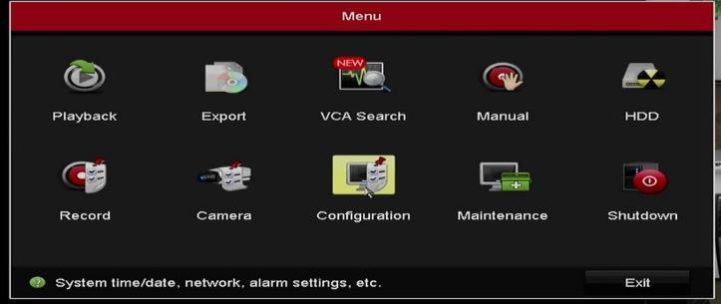
Step 2: Select “Configuration” from the Menu options. .
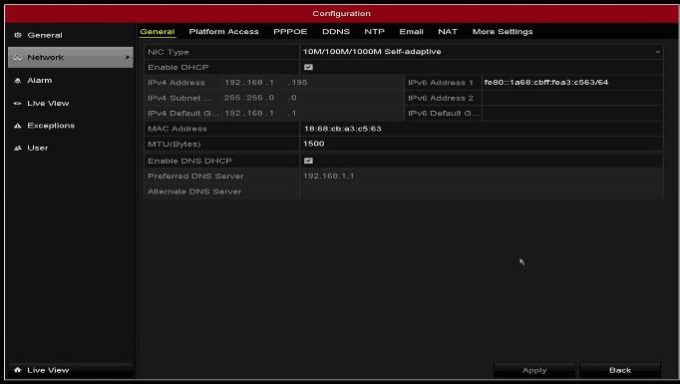
Step 3: Select “Network” and check the option “Enable DHCP” Click “Apply”
Step 4: Make sure your NVR/DVR obtained an “IPV4 Address” and “Preferred DNS Server” values automatically. If not, check your network settings and make sure your device is properly connected to your network router or switch.
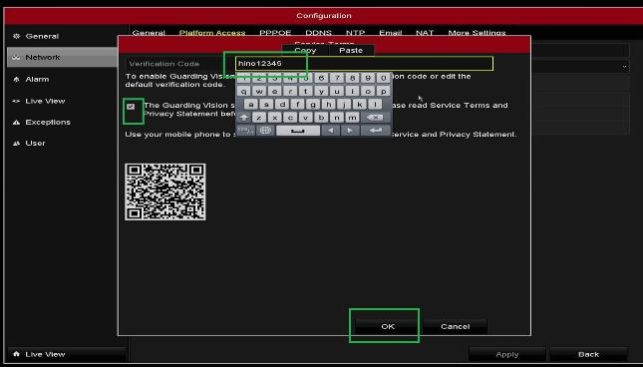
Step 5: Select “Platform Access” and check “Enable”. You will be taken to the service terms window.
Step 6: Create a “Verification Code” check the “Guarding Vision service terms” click “OK”.
Step 7: Click “Apply” to apply the settings. The status will change to “Online”. The QR Code being displayed on your device “Platform Access” page can be scanned with Guarding Vision app to add the device into your App. To proceed with adding the device into the app scroll down to “Adding NVR/DVR to Guarding Vision App”.
Method 2: From the NVR/DVR/IP Camera Web page.
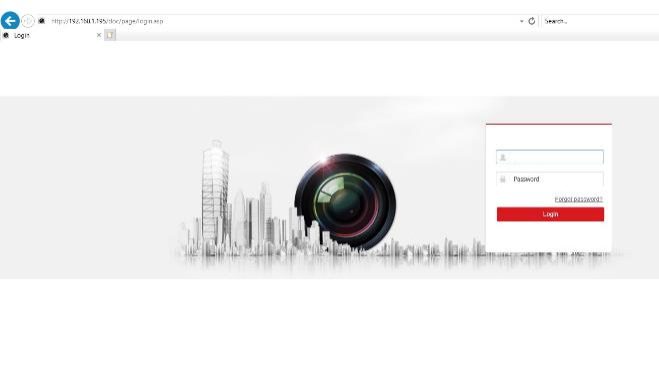
Step 1: Input the IP address of the NVR into the address bar and login with the credentials.
.
.
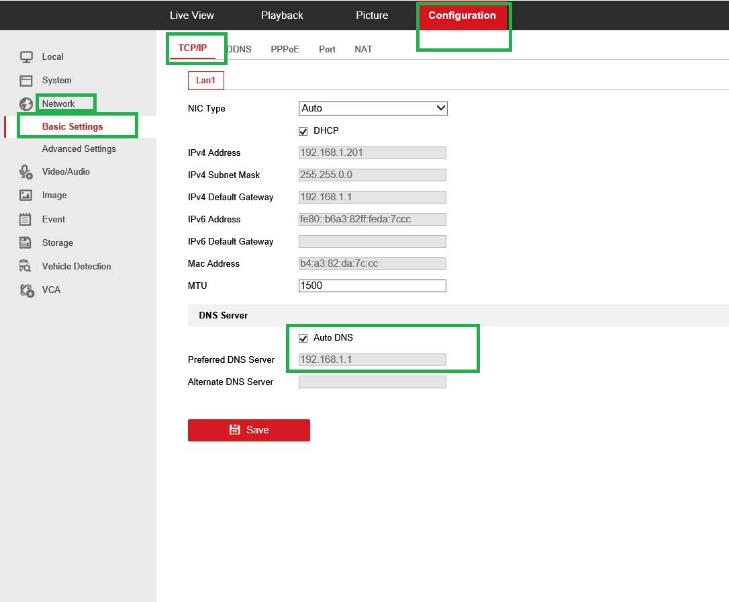
Step 2: Go to Configuration Network Basic Settings
.
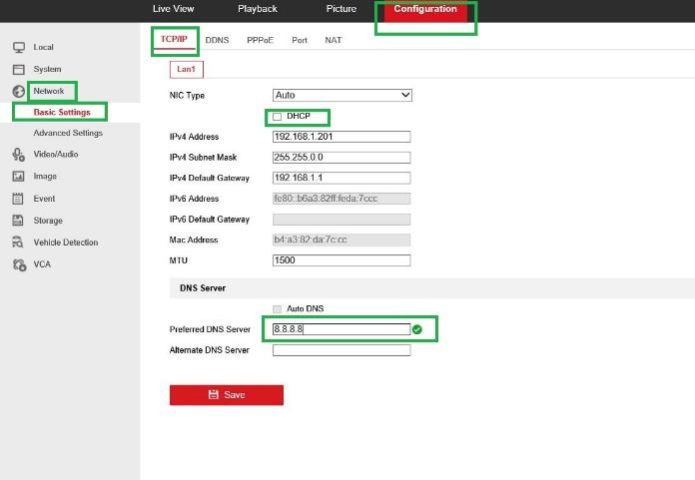
Step 3: This step should be performed if you do not see a “Preferred DNS Server” address.
Go to Configuration Network Basic Settings TCP/IP Uncheck “DHCP“ Uncheck “Auto DNS” and input 8.8.8.8 for “Preferred DNS Server”. Click “Save”
.
(Refer to the figure below)
.
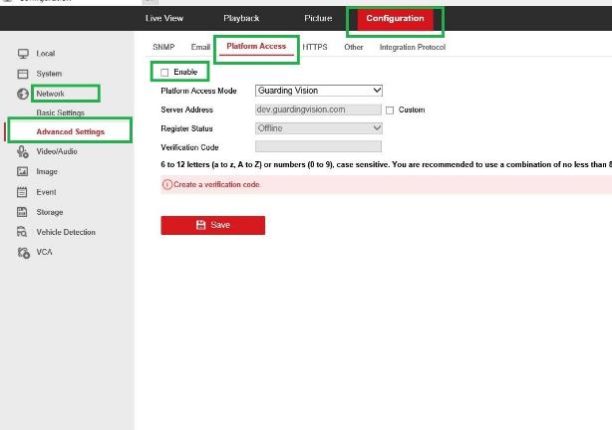
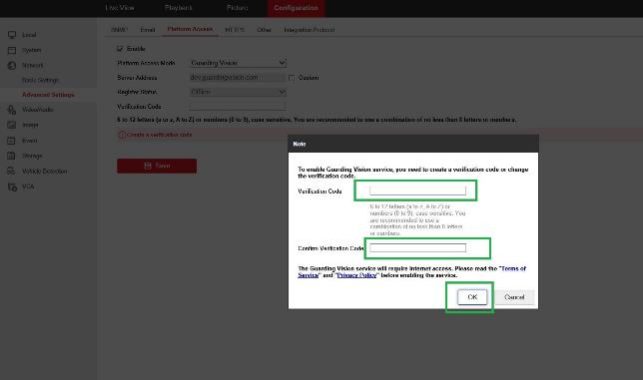
Step 4: Go to Configuration Network Advanced Settings Platform Access Check “ Enable”
Step 5: Create a “Verification Code” and Click “OK”
Step 6: Click “Save” to save the “Platform Access” Settings. Now refresh the browser page to check the Register status. After refresh the register status should show “Online”.
(See the figures below for reference)
Adding the NVR/DVR to Guarding Vision App
Method 1: Using the QR Code
Download and install the Guarding vision app on the Mobile. Register and Create a Guarding vision account on the App.
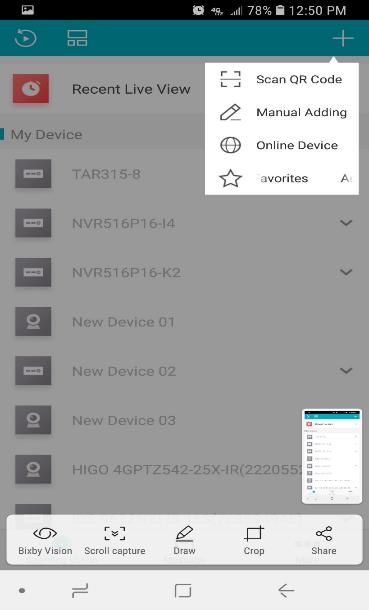
Step 1: Tap on the “+” to add a new device. Select “Scan QR Code”. Scan the QR Code displayed on the NVR’s Monitor.
Step 3: Scan the QR code from the device sticker or Login to the device Local Menu and go to Menu Configuration Network Platform Access to access the QR Code.
Method 2: Add Device with Serial Number
.
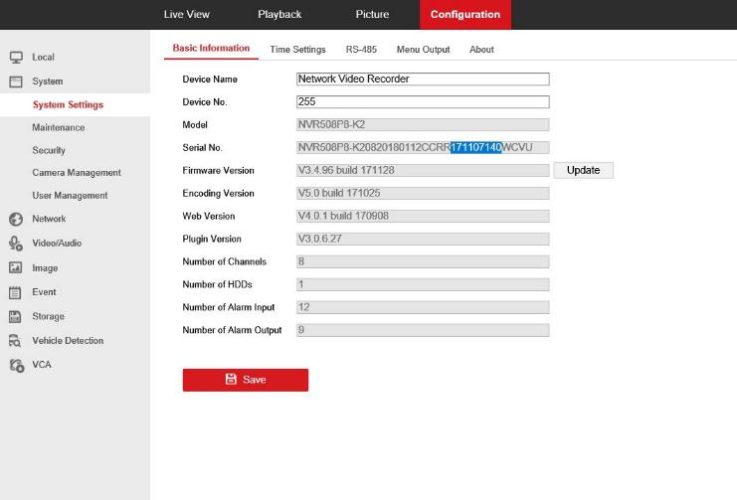
(Only the last 9 digits of the serial number are needed to add the device into the App.)
.
Step 1: Tap on the ‘+’ icon and select “Manual Adding”
.
Step 2: The serial number can be accessed from the device sticker. To access the serial number from the web config, go to Configuration System System Settings Basic Information
.
(Refer to the figure below)
.
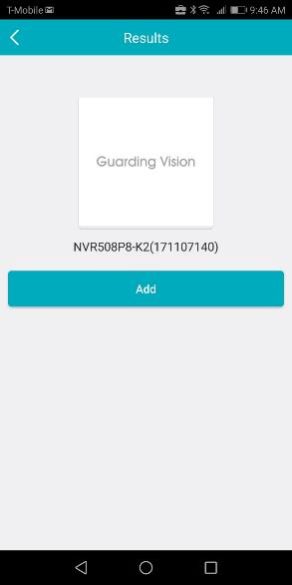
Step 3: Once the “Manual Adding” Option is selected, You will be directed to the Add device page with “Serial No.” Input the serial number and click on 
.
Step 4: Click “Add” to add the Device.
.
.
.
.
Step 5: Input the Verification Code that was created and click “OK”.
.
(You can find the code from the device web Config. Go to Configuration Network Advanced settings Platform Access.)
.
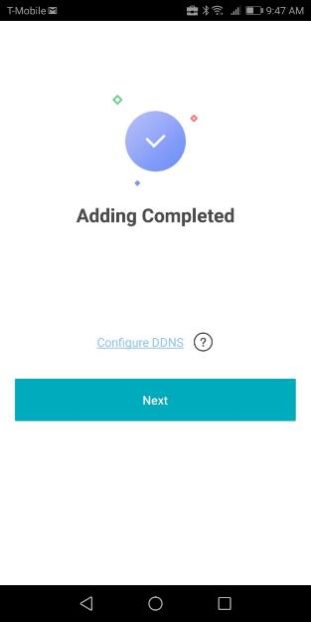
Step 6: Tap on “Next”. Create a Device name in the “Edit Alias” page. Tap “Save”.
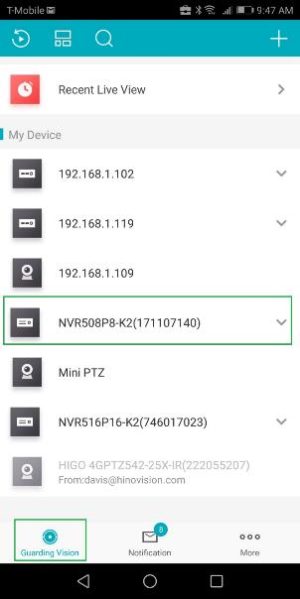
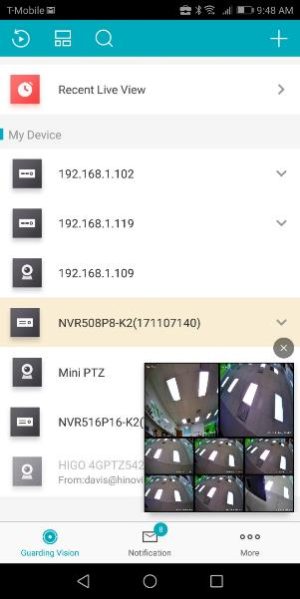
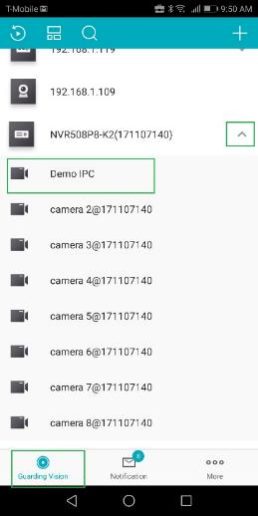
Step 7: Tap on “Guarding Vision” at the bottom of the app to see your device listed. Tap on the device name to view the cameras connected to the device.
.
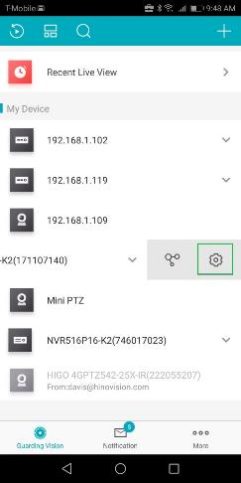
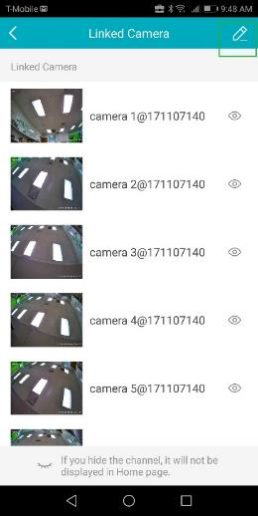
How to Change Camera names on the App
.
SADP Reset Process
Reset Device password using SADP Tool
(Note: Do not disconnect or power off the recorder or cameras till the process is finished)
Download SADP Tool: https://app.box.com/s/mzbh5zeka0psff86gwqe0838pp6ym8bz
Step 1: Select the desired device by clicking on the check box next to the device name and select “forgot password” from the bottom right.
.
.
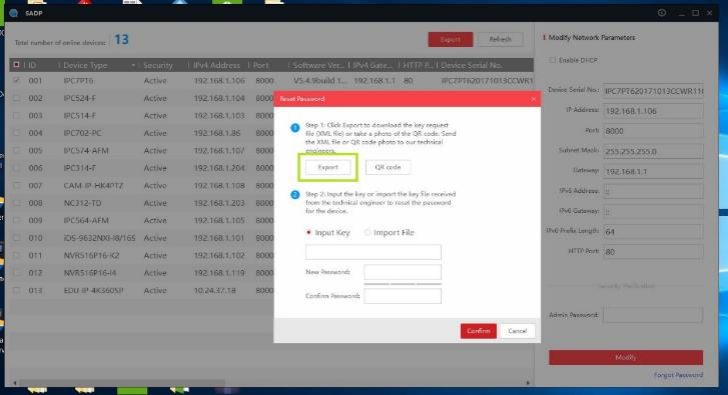
Step 2: Opens a “reset password” window –> Click “Export” (this exports an xml file) and save the file to any location on the computer.
.
.
–
Step 3: send the xml file to You will receive another xml file from the support team for reset.
.
Step 4: Download and save the file received from the Hinovision Support.
.
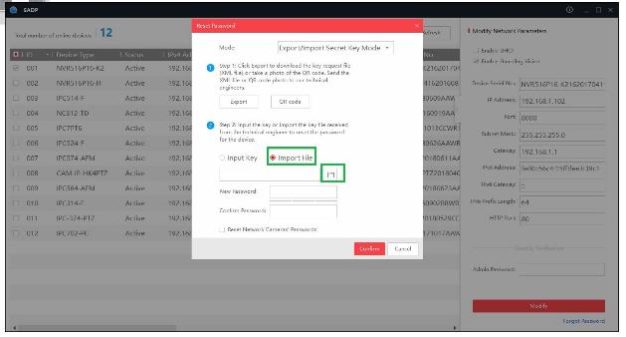
Step 4: Select “Forgot Password” –> on the “reset password” window, select “Import File”
– Click on the folder icon and browse to the received and saved “.xml” file.
– select the xml file.
– Input the new password and confirm password
.
.
Unbind NVR/DVR/IP Camera
Note: Performing the below methods for unbinding will require the device login password. If you do not have the password, click the following link:
.
Method 1: Using the Guarding Vision App
Step 1: Connect your mobile phone to WIFI and make sure you are on the same network as the NVR/DVR/Camera.
Step 2: Open Guarding Vision app and select “More”.
Step 3: Select “+” icon on the top right and select one of the adding methods.
For example:
– Select “Scan QR Code” to scan the QR Code from the Platform Access page or the device sticker.
– Select manual adding to enter the serial number of the device as shown on the sticker.
– Select Online Device –> Add to Guarding Vision Server
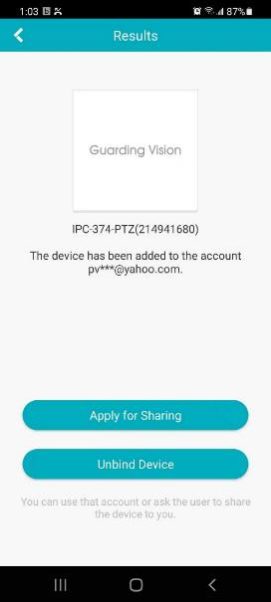
Step 4: Select “Unbind Device”
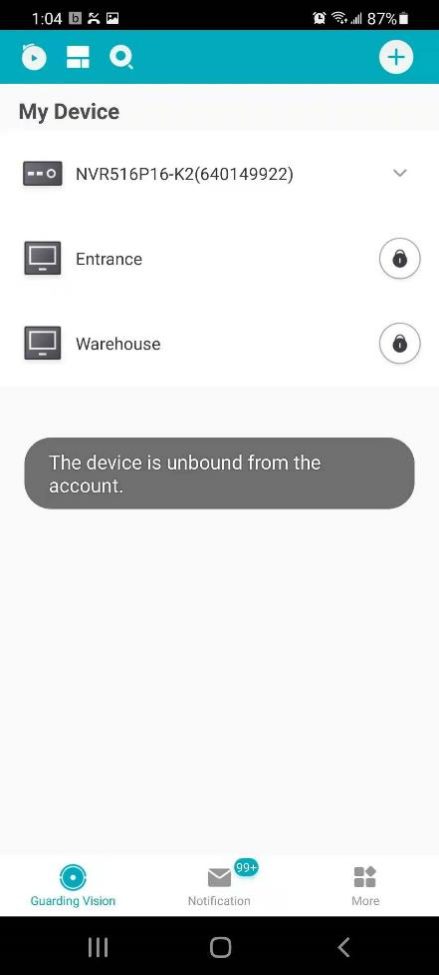
Step 5: Enter the password for the NVR/DVR/Camera and the CAPTCHA code as shown. Select “Finish”. You should see the message “The device is unbound from the account”. Now proceed with readding the device to a new account
Method 2: Using the SADP Tool
.
Step 1: Connect your Laptop/PC to the same network as the NVR/DVR/Camera.
Step 2: Download and install the “SADP Tool” application from the link below.
SADP for Windows: https://app.box.com/s/689l18421knsokmmontcc2v28owmz4om
SADP for MAC: https://app.box.com/s/brssh8rpfbo5gjuzetopbtjwtr5fy7kc
Step 3: Select the device by checking the box next to the device name
Step 4: Select “Unbind” option
Step 5: Enter the Username as “admin”, Password for the NVR/DVR/Camera and the verification code as shown next to the text box.
Step 6: You will see the message “Unbind Successful”.
.
Method 3: From the NVR local menu
(Note: This method is applicable only to NVRs and DVRs with 4.0GUI or later.)
Step 1: Right Click and select the Home( 
Step 2: Select System Network Advanced Platform Access Unbind Enter the password for the NVR or DVR.
.
Find Verification Code
Method 1: Find Verification Code from NVR/DVR Local Menu
.
Step 1: Connect a Monitor and a Mouse to the recorder (NVR/DVR)
Step 2: Right-Click on the screen and select “Menu”
Step 3: Select Configuration –> Network –> Platform Access/Cloud P2P –> Verification Code –> Click on eyelid icon to reveal the Verification Code
.
Method 2: Find Verification Code from browser
.
Step 1: Open the “Internet Explorer” Browser and input the IP Address of the Recorder (DVR/NVR) into the address bar
Step 2: You will see the login page for the recorder. Input the User Name as “admin” and input the password that was assigned to the recorder
Step 3: Go to Configuration –> Network –> Advanced Settings –> Platform Access/Cloud P2P –> Verification Code –> Click on eyelid icon to reveal
Firmware Upgrade Instructions for NVR and DVR
.
.
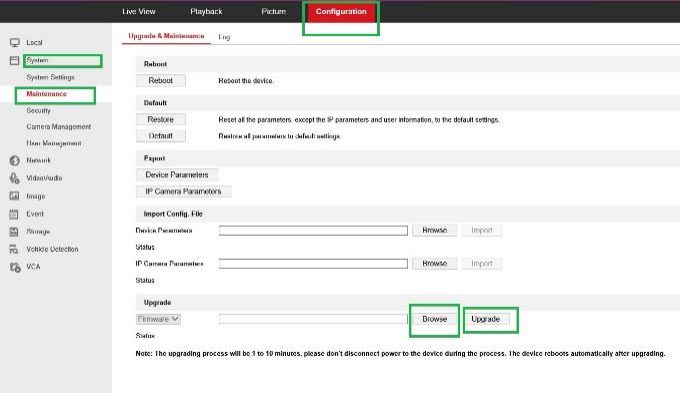
Method 1: Install the firmware from the web browser:
Log into the camera and go to
Configuration System Maintenance Upgrade Browse to the “digicap.dav” file and click “Upgrade”.
.
.
.
.
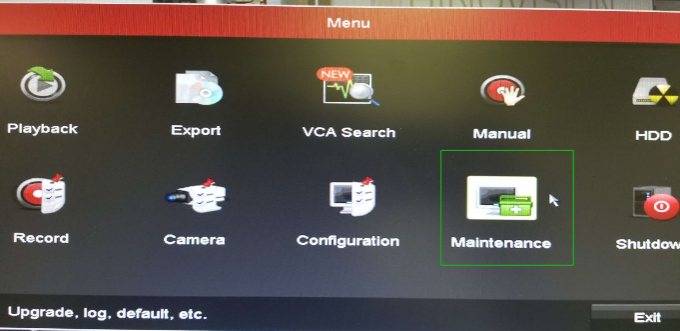
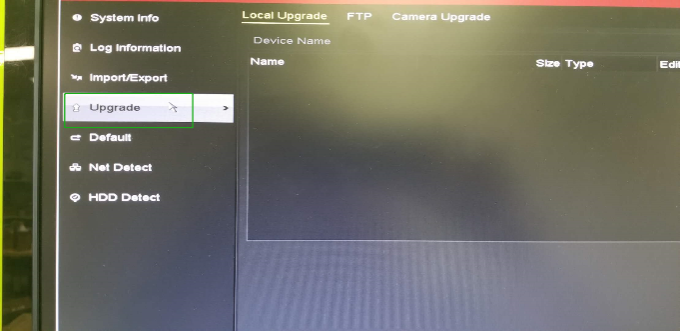
Method 2: Install from the DVR local menu:
.
Password Recovery Methods for NVR and DVR
.
Method 1: Reset device using SADP Tool
.
Step 1: Select the desired device by clicking on the check box next to the device name. Now, click on “Forgot Password” option on the bottom right corner. This will open the “Reset Password” window.
.
Step 2: In the “Reset Password” window, click “Export” (this exports an xml file) and save the file to any desired location on the computer.
.
–
Step 3: send the xml file to support@hinovision.com. You will receive a xml file for reset.
.
Step 4: Download and save the received file.
.
Step 5: Now on the “reset password” window, select “Import File”
– Click on the folder icon and browse to the received .xml
– select the xml file that you received and saved
– Input the “New Password” and “Confirm Password”.
– Click “Confirm”.
Method 2: Reset using Guarding Vision App
Currently Supported HINO devices:
NVR Models:
NVR532P16-I4, NVR516P16-I4, NVR732-I8, NVR764-I8.
DVR Models:
AR526-32, AR524-32, AR324-4, AR324-8, AR324-16, AR326-4, AR326-8, AR326-16, AR328-4, AR328-8.
Other Supported DVR Models:
AR526-24, ARA26-16, AR524-24, AR526-16, AR526-8.
.
Required Firmware:
V4.1.65 or above
.
Step 1:
.
Initial setup for enabling Password reset from Guarding Vision
The following two steps need to be performed for the user to be able to reset the NVR using the Guarding Vision app. Instructions for using the Guarding Vision app to reset follow.
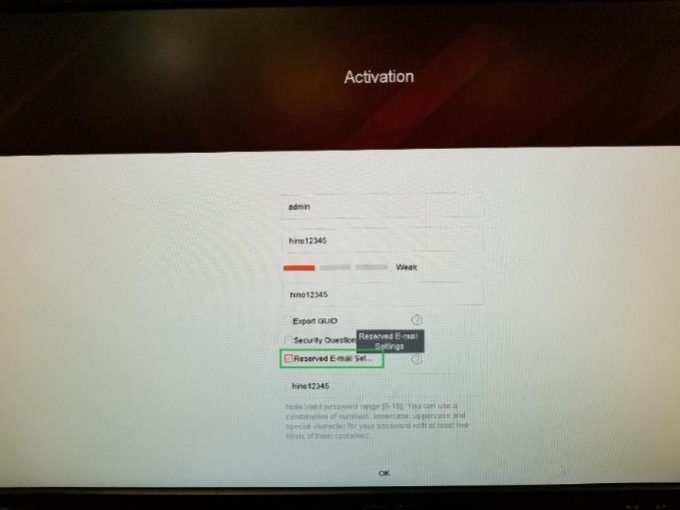
Step 1: During the initial device setup, make sure the “Reserved Email Settings” option is checked.
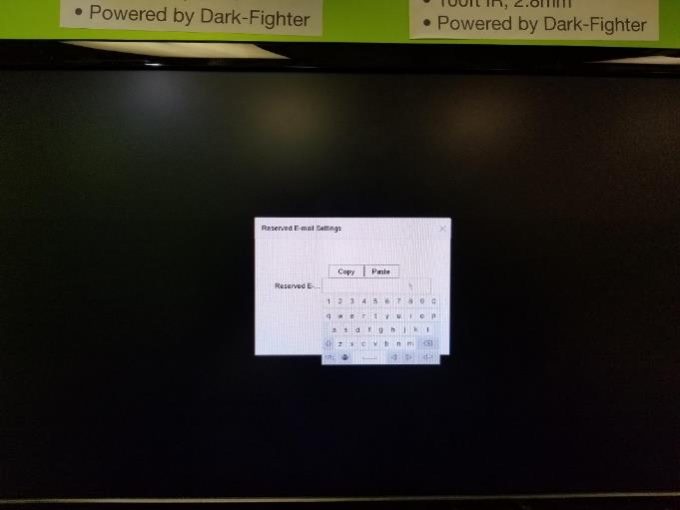
Step 2: Once the Reserved email settings option is enabled, the following screen as shown in the figure below should appear. Input the email that you wish to receive the password reset verification code.
(Note: Please enter a valid email)
Step 2:
Resetting password from the Guarding Vision App
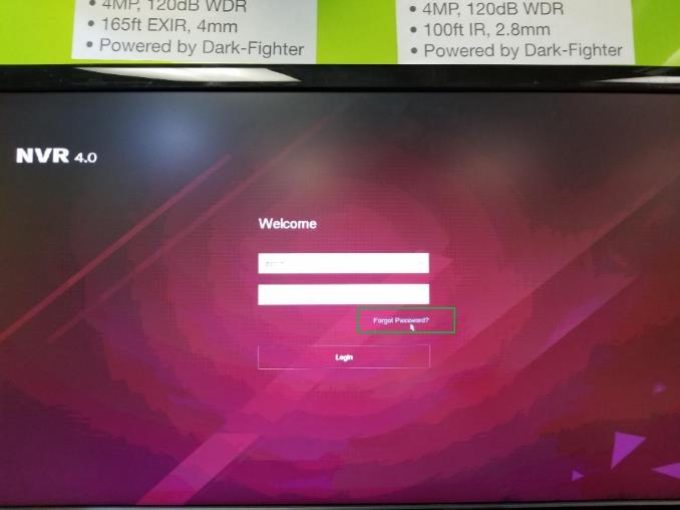
Step 1: On the NVR login screen, click on “Forgot Password”
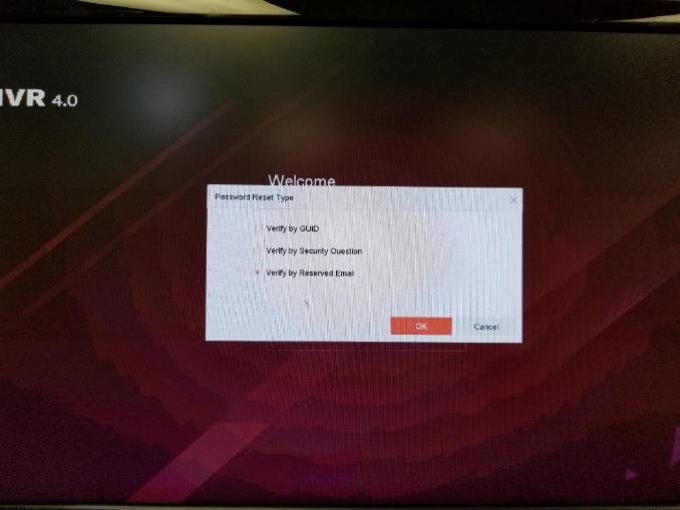
Step 2: On the following screen as shown in figure below, select “Verify by Reserved Email” and click “OK”
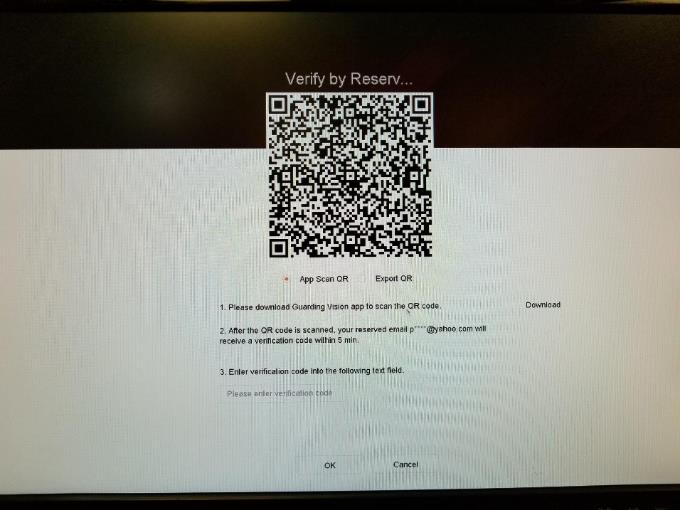
Step 3: You will be brought to a screen with QR Code.
Step 4: Open the Guarding vision App on your phone and go to More Reset Device Password.
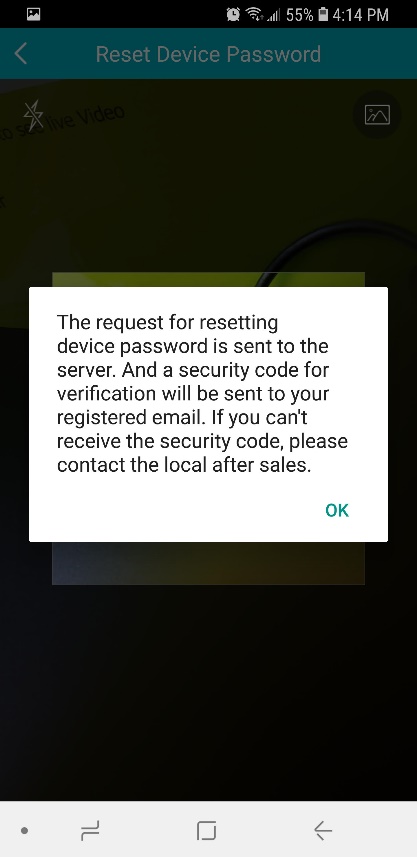
Step 5: Scan the QR Code shown on the NVR screen. You should see a message as shown in the figure below.
Step 6: Check your email to find the verification code and enter the code in the field provided and click on “OK”.
