EseeCloud CMS Full Setup Guide, CMS is called Camera Monitor System. It is a camera monitoring client for online preview image, video storage, remote playback, device management, video/screen download and other functions. It is suitable for DVR, NVR, IPC, VR CAM, Wifi IPC and other devices.
Foreword
Welcome to use our products! We are very honored to get your trust.
In order to have a general understanding of our product CMS and facilitate your use, we have specially configured this manual for you, including the function introduction, operation steps, precautions, etc., which are essential guides for your use of this product.
Please read the instruction manual carefully before use. I believe it will be of great help to your effective use of this product. In addition, if you have any questions during the use, please feel free to contact us, we will be happy to serve you.
Applicable Model
This manual is for the camera monitoring system CMS.
Statement
This manual may contain areas where the product functions or operations do not match, or where the technology is inaccurate, or a typographical error. For such problems, our company will update the manual content according to product updates, and regularly update the hardware and software products described in this manual. The updated content will be added to the new version of this manual without prior notice.
The contents of this manual are for reference guidance only, and are not guaranteed to be identical to the actual product. Please refer to the actual product.
Agreement
In order to simplify the description in this manual, make a convention:
The camera monitoring system CMS is referred to as CMS or software for short;
DVR, NVR, IPC, VR CAM, WIFI IPC equipment, etc., collectively referred to as equipment;
Click for the left mouse button click, double click for the left mouse button to double click;
Some pictures are schematic, please refer to the actual interface of the software;
A “note” hint text may appear in this article to indicate that the operation is potentially risky, and ignoring the text may result in errors or unpredictable results.
EseeCloud CMS Full Setup Guide
Introduction to EseeCloud CMS
1.1Function introduction
CMS is called Camera Monitor System. It is a camera monitoring client for online preview image, video storage, remote playback, device management, video/screen download and other functions. It is suitable for DVR, NVR, IPC, VR CAM, Wifi IPC and other devices.
CMS has the following characteristics:
Interface containerization processing mode: In the interface design of the client component, the containerized processing is carefully adopted, which simplifies the processing mode of multi-screen and single-screen switching, greatly improves the multi-screen operation feeling, and adapts to the development trend of a multi-screen PC.
Channelized management mode: In the client component design, channelized management mode is added, and the traditional design mode with device as the core subject is abandoned, which is more suitable for the development direction of IP monitoring.
1.2 Operating environment
Operating system:Microsoft Windows7 / Windows 8 / Windows 10 (32/64 bit Chinese and English operating system)
OSX 10.9 or higher (64-bit Chinese and English systems)
CPU:I3/2.4GHZ or more
Memory: 4GB or more
Graphics card: integrated graphics (Intel HD 4000 and later), discrete graphics (NVIDIA GeForce GTX 460 and later)
note:
Preview multiple video or high resolution video at the same time, requiring higher hardware configuration and network bandwidth
2. Installation login
2.1 Installation and operation
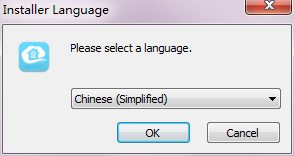
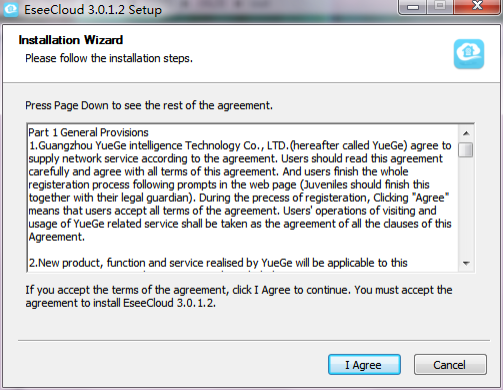
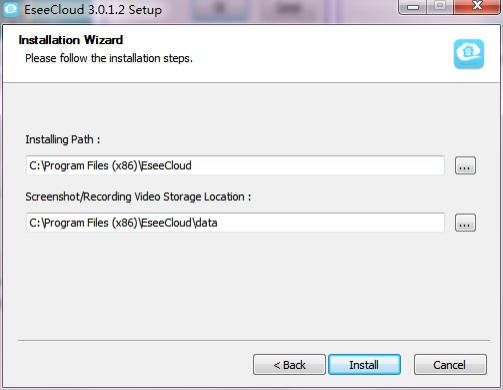
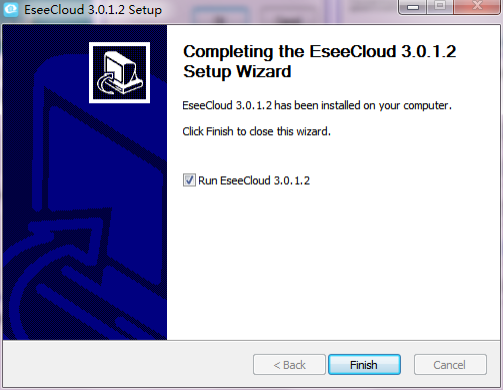
④Determine the path ⑤The installation is complete
2.2 User login
2.2.1 Local login
①Enter account + password ②Click to login
note:
2.2.2 Cloud login
Note:
①The cloud login should be logged in with the registered account (the account registered by the mobile app can be logged in)
②Registered account is recommended to use a valid mailbox, easy to retrieve passwords and other special circumstances
③After registering an account, you need to log in to the email address you entered during registration to activate the email address (click the received link to verify)
④The mailbox status is not activated, and cannot be retrieved after forgetting the password (activation period is two days)
⑤The first time you use EseeCloud_CMS, the software’s time zone will automatically sync with your computer, and you can change it later in the advanced settings.
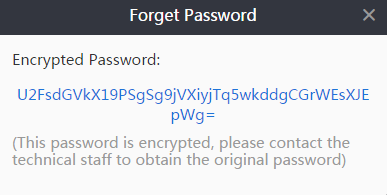
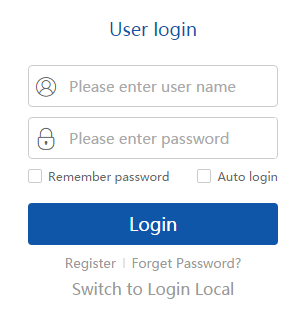
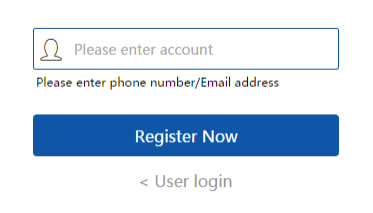
⑴Login account ⑵Register a new account ⑶Retrieve password
3. Live Preview
3.1 Connection/Disconnection
connection:
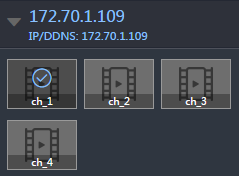
①Double-click on the selected device/channel to enter the connected video state.
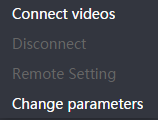
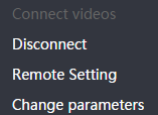
②After selecting the device/channel, right click and select “Connect Video” to enter the connected video state (Figure 1)
disconnect:
③Double-click to disconnect the current connection after selecting the connected device/channel
④After selecting the device/channel, right click and select ‘Disconnect’ to disconnect the current connection.
Figure 1
①After selecting the device/channel, click the play button on the device list to enter the connected video status.
②After selecting the device/channel, click the stop button on the device list to disconnect the current connection status.
③Right-click operation connection/disconnection is consistent with the tree list style. The specific operation can be referenced.
Note:poor performance of the computer will directly affect the smoothness of the preview video. It is recommended that the number of channels connected to the device be gradually increased
3.2 Video/screenshot
①Click the Record button on the toolbar to enter the video recording status (as shown in Figure 1 below)
②After the video operation, click the record button again to stop recording.
Note:
①The actual recording duration is not equal to the time difference between the start recording time and the end recording time.
②If the device network is interrupted, the recording will succeed but no video file will be saved.
③The channel is maximized or minimized during recording, and the recording will stop.
Click the screenshot button on the toolbar to enter the screenshot status (as shown in Figure 1 below)
Note:
①If the switching stream video is not loaded, the screenshot operation will be saved.
②The screenshot does not have the function of continuous screenshots. Clicking the screenshot button once will capture an image.
Figure 1
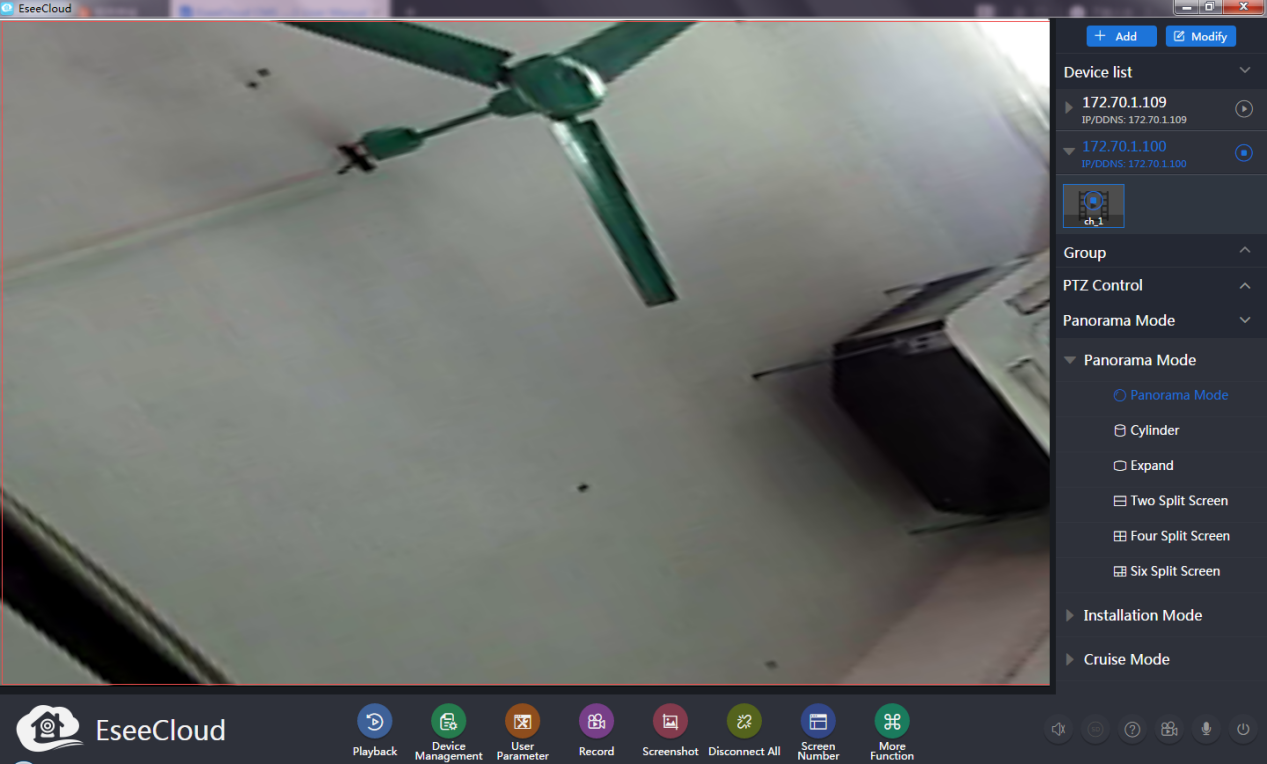
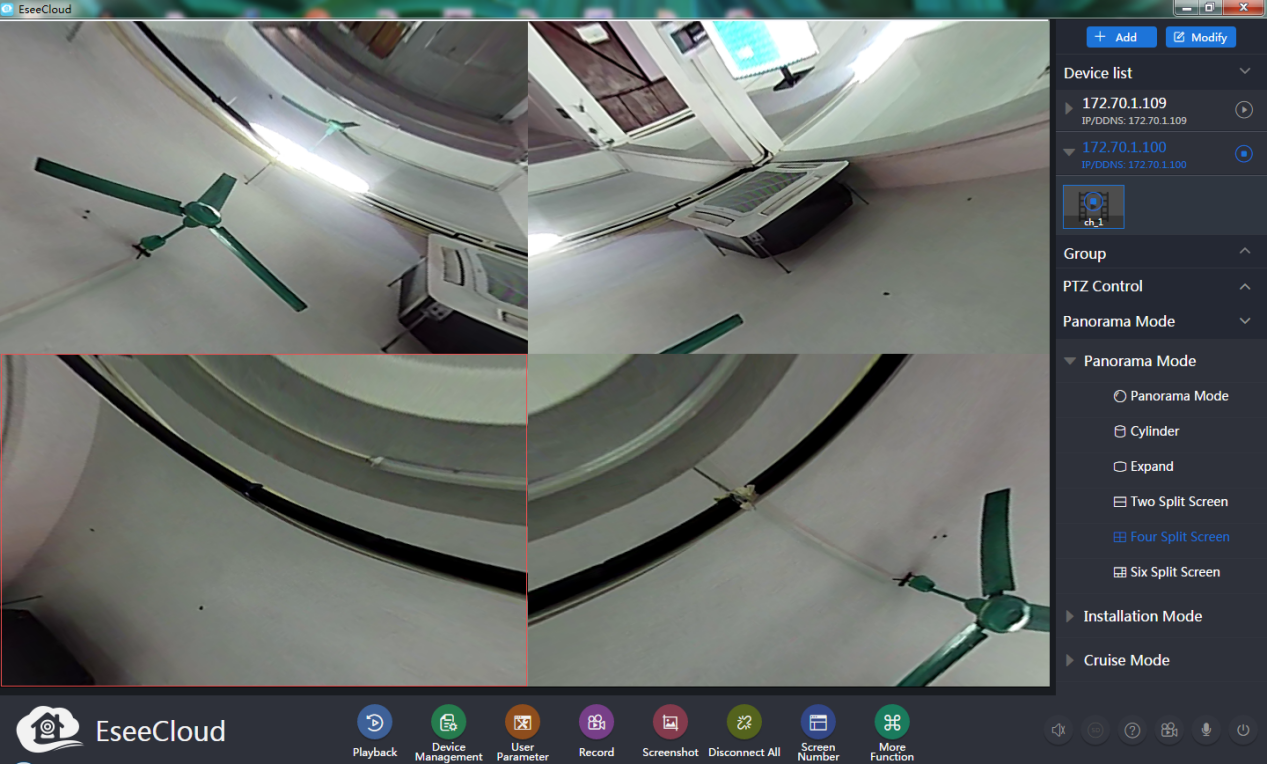
3.3 Panorama mode
enter:
①Double-click the channel screen to enter the maximized state, right click and select “panoramic mode” to switch to the panorama mode, enter the panorama, and the code stream is automatically switched to HD.
②The channel screen is in 1 split screen mode, and the panorama mode option is available on the right toolbar. Click to select to switch the panorama mode.
drop out:
①Click on Panorama mode on the right toolbar and select ‘Exit panorama’ to exit panorama mode
②Exit the panorama mode by exiting the screen from the split screen state.
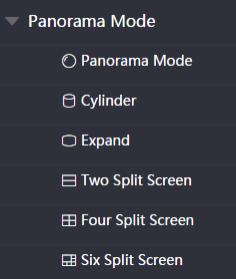
Panorama mode
Expand mode
Split screen mode
Quad screen mode
Six-screen mode
Note:
①In the local login mode, you can select 6 display modes in the panorama mode, including: panorama, cylinder, expand, 2 split screen, 4 split screen, 6 split screen
②In the cloud login mode, you can select 4 display modes in the panorama mode, including: panorama, cylinder, split screen, quad screen
Suspension: the direction of the cruise is clockwise
Wall-mounted: the direction of the cruise swings left and right
Speed: Cruise provides speed 3S / speed 40S / speed 60S three options, corresponding to slow / medium / fast three speeds
Stop: Pause the current state of the cruise, left click on the channel in the cruise or select the stop cruise button in the cruise mode to click
①Panorama mode ②Installation mode ③Cruise mode
3.4 PTZ control
The PTZ control function can be used only when the PTZ device (such as a ball machine) is connected to the main control device (such as NVR or DVR).
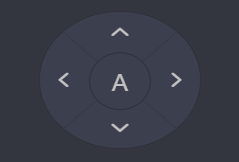
Cruise is to directly perform the screen cruise operation. The pan/tilt is to adjust the lens direction and zoom to replace the mirror multiple.
①PTZ speed level control ②control
③Zoom, focus ④Preset
①:Adjust the PTZ control speed (default level is 6)
②:Adjust lens direction and cruise
③:Adjust the zoom and focus of the PTZ camera
④:Set and call the set bit, adjust the lens to the specified position, set the preset position, input the preset position later, click to call, the lens will automatically move to the specified position
3.5 Split screen number
When the number of connected device channels is greater than the current number of split screens, the displayed split screen will automatically increase, reaching 49 split screens.
①Split screen number
3.6 Other functions
Other functions
Intercom
4.Video playback
4.1 Video playback
Playback four steps:①Select device channel ②Select video type ③Select playback date ④Confirm search video
①Device channel ②Video type ③Date selection
4.2 Timed playback
①Timed playback
②Timeline
4.3 Video sync
Steps:①Retrieve video ②Check sync ③Switching time point
4.4 Video download
①Custom bulk download

4.5 Other functions
①Playback control ③Adjustment scale
5.Equipment management
5.1 Add device
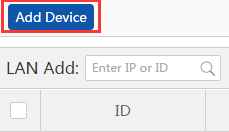
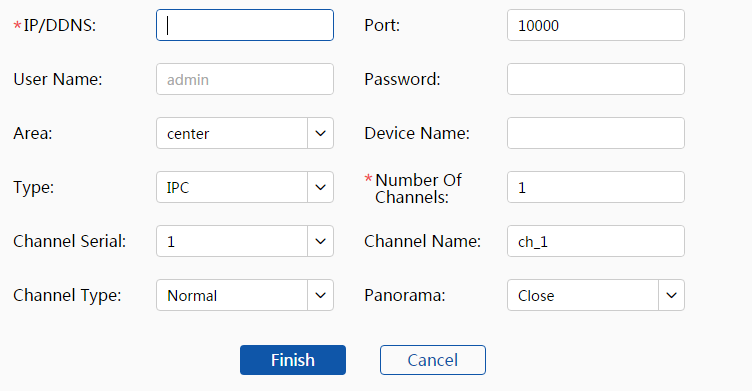
②Manual input addition
5.2 Modify device
note:Modify the channel name, panorama, and channel type corresponding to the channel number in the device. The panorama or channel type corresponding to each serial number is independent. The channel device in the device needs to be in the panoramic state. You can select the corresponding channel serial number to modify the panorama. And channel type
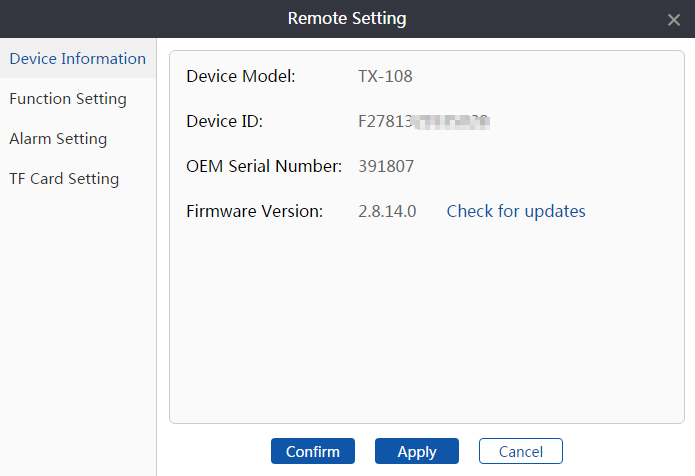
5.3 Remote setting
5.3.1 VR CAM/gateway Remote setting
Setup steps:①Selected device ②Click Settings / Connect Device and click the Remote Settings button (as shown in Figure 1)
note:
①Alarm message push is not supported in local login. You need to check to switch to cloud login status.
②Currently supports VR CAM/gateway devices for remote setup
Figure 1 Figure 2 Figure 3 Remote setting interface
5.3.2 D82 series NVR remote setting
Setup steps:①Selected device ②Click Settings / Connect Device and click the Remote Settings button
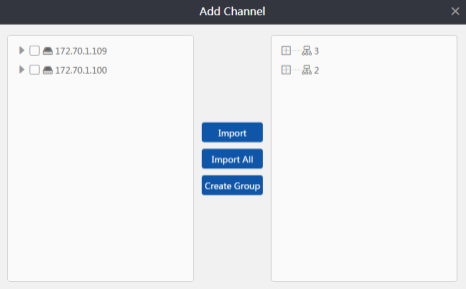
5.4 Device grouping
enter:①Select the created group ②Click the Add Channel button
Import selection:①Selected channel ②Selected group ③Click the import selection button
Import all:①Selected group ②Click to import all buttons
Edit: Select the group and click the Modify button to modify it.
Delete: delete the selected group or channel and click the delete button to delete
①Create a group ②Add channel ③Modify group
6. User parameter
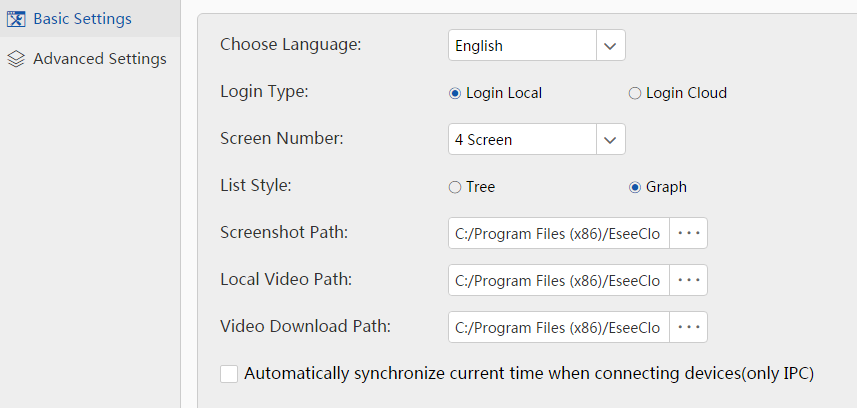
6.1 Basic Settings
①Screenshot path: The screenshot file is saved in the snapshot folder by default, and can be saved in other paths according to its own needs.
②Local recording path: The local recording file is saved in the record folder by default, and can be saved in other paths according to its own needs.
③Video download path: The files downloaded by the playback video are saved in the video_download folder by default, and can be saved in other paths according to their needs.
note:After modifying the settings, click “Finish” and you will need to log in again. (It is best not to modify it to a directory containing Chinese)
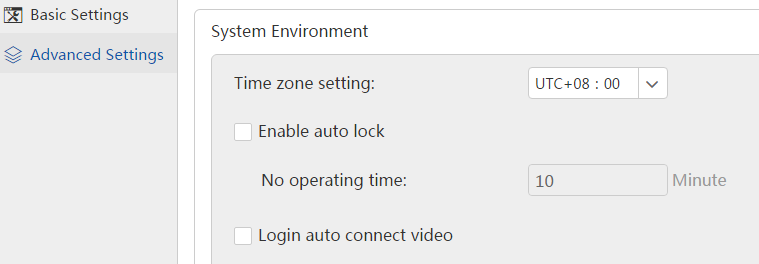
6.2 advanced settings
Basic Settings
advanced settings
7. More features
7.1 User Management
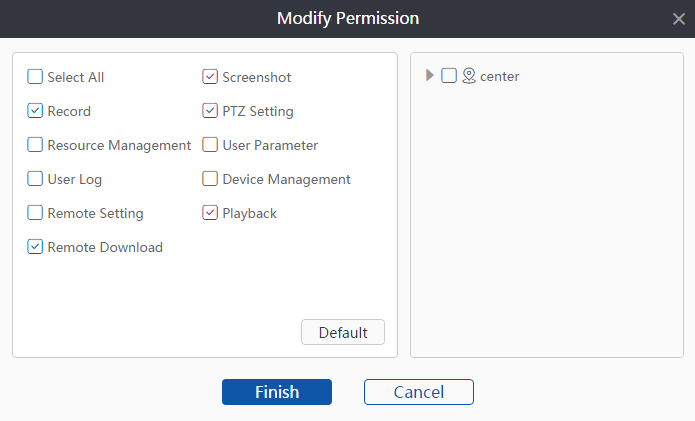
Default: The default permissions include screenshot, video, PTZ settings, video playback, remote download 5 items
modify:①Click edit permission ②Check the permissions and devices/channels that need to be assigned to new users (you can click to select all) ③Click to confirm
①Clear password: If the login password of the new user is forgotten, you can log in to the newly created user again by directly clearing the password and the internal setting data can be retained.
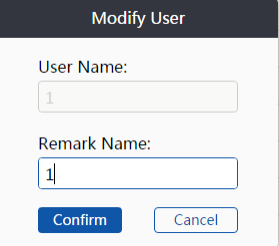
②Modify the note: Add a note, change the note or delete the note, go to the modify note operation
③Delete user: If you feel that the newly created user is not necessary, click delete user to delete the user.
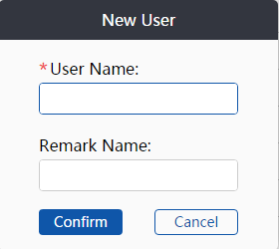
①New user ②Modify permissions ③Modify user
7.2 Log query
7.3 Resource management
search for:①Select ‘start time+end time’ ②Click search
Preview:①Method one selects ‘preview’ for right-click operation ②The second method is the screenshot file retrieved by direct click.
delete:①Method 1 Select ‘Delete’ for the right-click operation. ②The second method is to enter the screenshot preview state and click to select ‘delete’.
location:①Method 1 Select ‘Open location’ for right-click operation②Method 2 is to click ‘Save Location’ in the resource information.
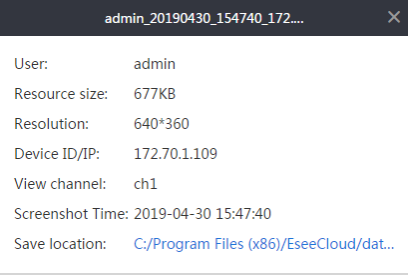
Resource information:‘user, resource size, resolution, device name, associated channel, screenshot time, save location’, including the above content (as shown in Figure 2)
Replacement size:‘Original size, maximize, zoom in, zoom out, resource information, delete’, the screenshot preview status includes the above status/function that can be switched to
search for:①Select ‘start time+end time+’②Select the recording type (including: preview video, playback video, default all types)③Click search
Resource information:‘user, resource size, recording type, device name, associated channel, recording time, save location’, including the above
Other functions:The operation steps of ‘preview, resource information, location, delete’ function are the same as the screenshots. For details, please refer to the operation in the screenshot.
Figure 1 Right click operation Figure 2 Resource information
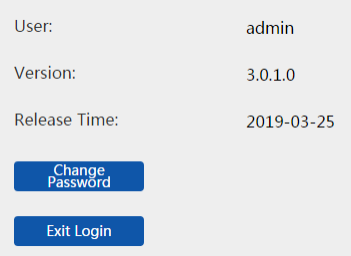
7.4 System Info
8.Frequently Asked Questions
Question one:After installation, open the CMS and display “Cannot load plugin”?
Answer one:
1.Please confirm whether the installation path uses Chinese when installing, and the plugin is temporarily not compatible with Chinese path.
2.After confirming the non-Chinese path, if the problem persists, you can contact technical support for assistance.
Question two:After connecting multiple channels of video (more than 30 channels), videos stop for a few seconds , all channels are automatically disconnected into the black screen. The device connected again has no response. Do we need to restart the CMS?
Answer two:The new version of CMS3.0.1 runs with higher memory. If you connect many channels by the lower configuration computer, the computer system will run out of memory, causing the CMS to run abnormally. If the computer configuration is slightly lower, it is recommended not to connect too many channels. The optimization work has been planned for this situation.
Question three:When CMS is installed on the OSX system, it displays “File is corrupted” or “Unable to open” when it is opened?
Answer three:
1.Open “System Settings” → “Security and Privacy” → “Allow applications to be downloaded in the following location”, check “any source” (applies to versions prior to OSX10.12.X);
2.Open “Terminal”, enter the string “sudo spctl –master-disable”, press the “Enter” key, enter the sudo password (applicable to versions after OSX10.12.X). If the above method still does not work, please contact us to help you solve it.
Question four:After starting a window and flashing, it will not start or XP will appear. Open the software to indicate 0a00000000 memory referenced by 0x00000000 instruction. The memory cannot be ‘written’.
Answer four:Large probability video card driver problem, update the graphics card driver can solve
Question five:It shows mfc100u.dll lost when opening computer
Answer five:Install VC++2010 library to solve the problem
Tool software
>>>Computer remote client: Eseecloud 3.0.8.0(Windows7.8.10 system)
>>>Computer remote client: Eseecloud 2.0.8(MAC)
>>>Hard disk linked computer backup data Tool
>>>Video player (for nvr backup video file playback)
>>>Computer remote client manual in Chinese and English
.


